When I was about 10 years old, my father took the family to Ontario, Canada to a place called Lac de Milles Lacs. I had no clue where I was, but it was gorgeous and way back in the woods. My mom didn’t complain, but my sister was not very happy with the accommodations… This is where I first observed someone filleting walleye.
WARNING: This article contains graphic images of fish filleting that some readers may find disturbing.
No electricity and no running water, except for a pump in the kitchen sink and the “facilities” were about 30 yards behind the cabin. The lake was full of leeches; bears kept us in the cabin at night. However, it was some of the best walleye fishing I have ever experienced. In fact, I remember one particular afternoon during which a “triple” was more of the rule than the exception.
But more importantly, I saw my first walleye filleted by a family friend who was also on the trip. Ray was a great outdoorsman with a belly laugh that would make anyone join in. And after the stringer of walleye was brought in, he was as fast as lightning with a fillet knife. In fact, he was faster than anyone I have ever seen, before or since. I later nicknamed him “30-Second Ray” – and the finished fillet was as if prepared by a surgeon.
(This page may contain affiliate links. Read our disclosure about affiliate links.)
This Looks Easy
I thought: “this is easy” and asked if I could give it a try. I failed miserably on my first attempt (a 1½-pound walleye was reduced to a patch of flesh about 6 inches long; Ray exploded with laughter), but I swore I would learn to emulate his expertise. After watching a good many fishermen and “dock boys” who were experts at the task – and a lot of practice – I managed to hone my own skills. And, after 30 years of filleting walleyes using the same method I learned from my mentor, I actually got pretty good – albeit never as fast.
One summer, a resort owner in northern Minnesota showed me a different way. I was amazed at how easy it was. The finished product yielded as much if not more fillet, and the method seemed even easier. Ray is now long gone, but wherever he is; I know he would be proud of me.
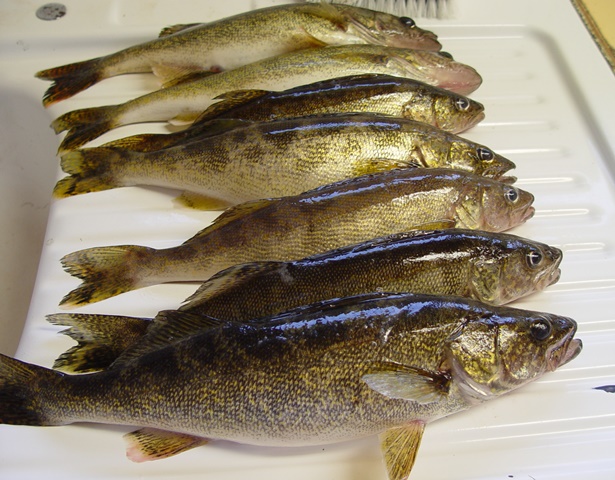
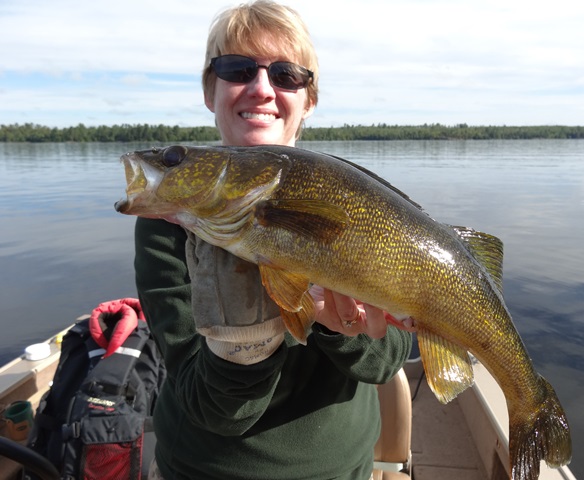
Walleyes are some of the most sought-after fish in any lake. If you have not yet seen or don’t know this method, I hope that the text and graphics that follow will help you to learn it.
Filleting Walleye Instructions
Step 1
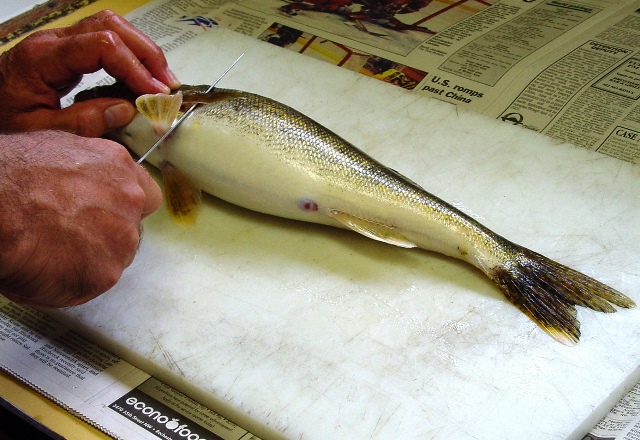
Start as you might normally start, with the fish belly towards you and fish head on your left. (This method would be used by a right-handed person; simply rotate the position of the head 180 degrees to the right if you are left-handed.) Make the first cut down and into the fish just behind the pectoral fin, stopping at the backbone. Need a recommendation for a good fillet knife? Read my article about knives.
Step 2
Then, turn the knife and, keeping pressure on the back of the blade, cut along the backbone and through the rib cage all the way through to the tail and out. The whole side of the fish comes off and the rest of the rib cage remains attached to the fillet.
Turn the fish over so that the back or dorsal side is now facing you. Repeat the process. You now have two fillets with rib bones intact and waiting to be removed.
Step 3
From here, I originally learned to remove the rib cage by placing the fillet skin-side down and cutting down behind the ribs and then out to the belly, following the curve of the rib cage with my knife.
I did OK and eventually got very good at removing the rib cage…. But trying to follow the curve of the ribs down and toward the skin was difficult and somewhat inefficient. The angle was steep, and it was easy to waste good meat.
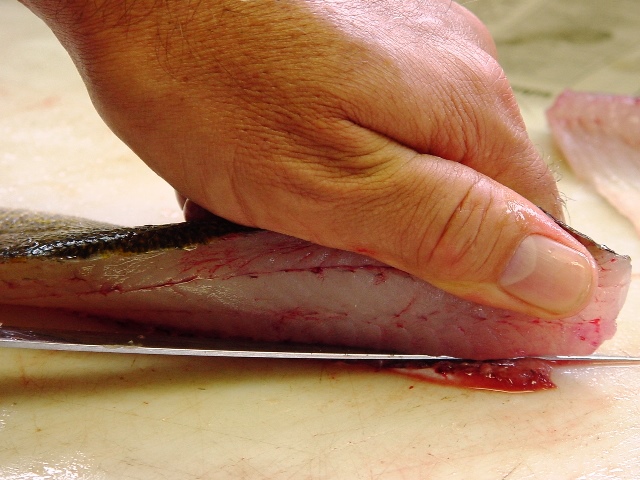
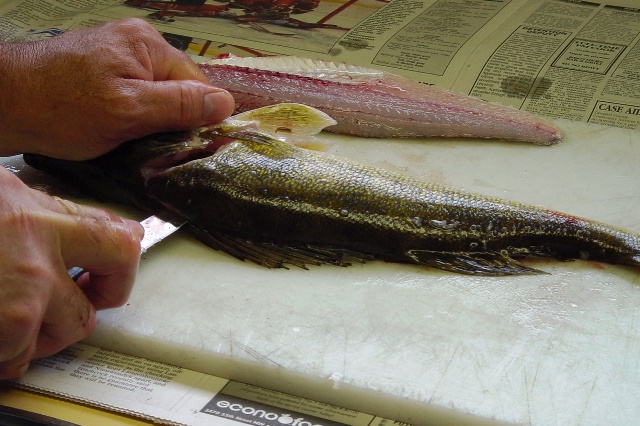
This “new” method has me place the rib cage-side of the fillet down. It is more effective and actually easier. More importantly, placing the rib cage side down, you can help to flatten the rib cage, making it easier to follow the curve of the ribs.
No matter which of the two fillets you are going to debone, place the knife at the anterior (front) end of the fillet and just above the rib cage. Use one hand to apply downward pressure to the fish – and the rib cage – to flatten out the rib bones.
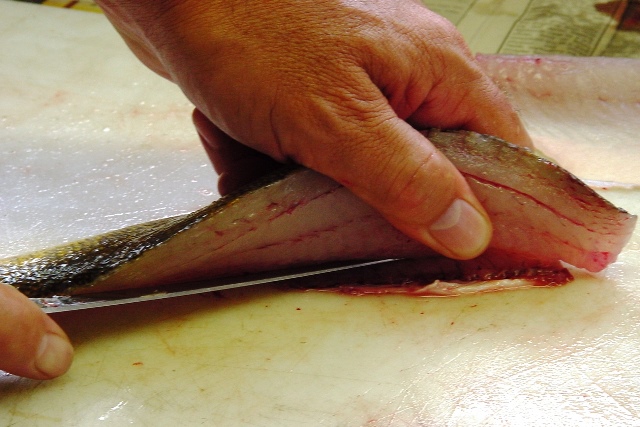
Step 4
Cut towards the belly of the fish and gradually work toward the posterior or tail of the fish, allowing the knife to simply follow along and just above the now-flattened rib cage. Flattening the ribs makes the cut easier and straighter and results in less waste of good fillet.
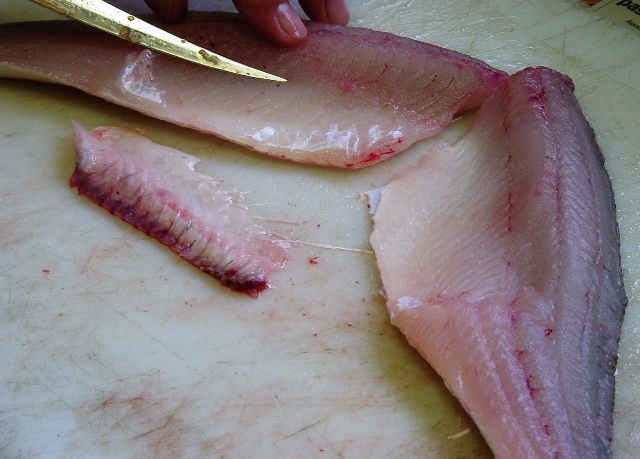
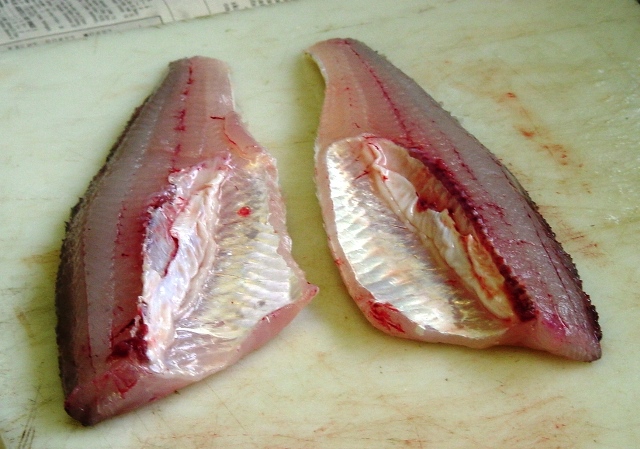
The result will be two very nice fillets that are truly boneless and ready for your favorite recipe; all that is left for you to do is to remove the skin (see my article about Removing the Skin from Fish Fillets).
As always, it will take a little practice to get good at this. I know you will like the results, and no bones will be left in the fillets. All you need to do is to skin the fillets and enjoy some fresh walleye! If you’d like to see a video of this fish filleting method, watch R. Karl’s YouTube video!
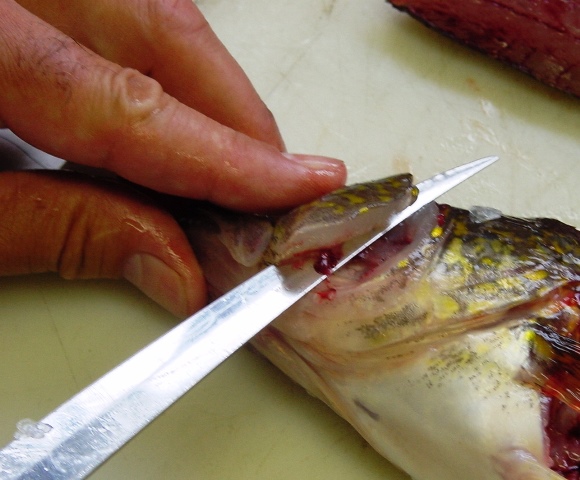
And… if you don’t already save the “cheeks” from your walleyes, I encourage you to do so. These morsels are easily removed and considered to be the “fillet mignon” of the walleye. The cheek socket is shallow and bowl-shaped and lies just behind the eye of the fish. Just cut down, around and back up, following the contour of the cheek socket. Then slip the knife between the skin and the meat and separate the two.

The cheeks can be used to make several fish dishes as well as one of my favorite hors d’oeuvres: Walleye Cheek Dip. This and several other delicious walleye recipes can be found in the Recipes section of this website.